iCreate: How the iPad facilitates content-creation in the classroom?

iCreate

Andrew Douch wrote “the iPad is a swiss army knife of content-creation tools”. I read that sentence in his blogpost ‘How an iPad is a More Powerful Content-Creation Device Than a Laptop‘ and realised that he managed to say what I have been trying so hard to say for months, but just couldn’t find the words or gather the courage. I constantly come across teachers who argue that the iPad is very limiting and restricting, and that a laptop is far more superior. I personally disagree, but found it hard to argue my case. Andrew Douch wrote that ‘if professional production quality is your imperative, then the iPad is not your best tool’ and that it may be best to find a more ‘technologically capable’ device. However, he did argue that it is more ‘pedagogically productive’. The paragraph that sums it all up reads as such:

‘But producing comparable creative content on an iPad is relatively quick, simple, yields impressive results with minimal fuss, and the learning curve is … well, there almost isn’t one! There is no need to connect an external microphone (the built-in one is better than that in any laptop), no need to adjust recording levels, no need to use a pop-filter. No need to import media from a recording device to the editing device (becasue they are one and the same), and it’s unnecessary to allow 10 minutes at the end of a class, to save, unplug devices, shut down and stow the laptops. Instead, when the bell sounds, students simply flip their iPad cases closed and walk to the next class!’

And that is the truth, ladies and gentlemen. The iPad combines so many content-creation tools in one device, that it truly is a ‘swiss army knife’. Right there from the same device (without any external supplementary tools, and with a few cheap apps), students have the opportunity to create podcasts, screencasts, movies, blogs, microblogs, websites, eBooks, wikis, electronic portfolios, animated cartoons, comics, annotated PDFs, annotated pictures, photos, paintings, drawings etc… Andrew Douch also wrote that:

We’ve had computers in schools for years, but in reality many (most?) classroom teachers don’t and never did have their students making podcasts, movies, eBooks and websites. Doing so seems too time consuming and for many non-technical teachers the learning curve appears disproportionate to the benefits realised.

Using the iPad will not produce the highest professional quality, but it will make all of these creations much quicker, and easier, and that’s what teachers need to tap into. I wrote this post with the intention of informing my school’s teaching staff of all the possible content-creation apps that I have come across. The apps I mention here are definitely not the only ones that can do what they are designed to, but they are the ones that I am aware of and have previously used. I will divide the list according to its potential for content creation. So, here goes my attempt:

  1. Blogs/websites: I use the WordPress iPad app, as well as the Blogger app for blogging. Generally, I set up the accounts for the students using a class gmail account (due to age restrictions and safety reasons). On a blog, you can have pages, and sub-pages, and you can embed videos, screencasts, photos, files (through Google Drive, for example) and much more, which essentially means it can be both a blog and a website.
  2. Screencasts: My favourites are definitely ShowMe and Explain Everything. ShowMe has the advantage of being an online learning community, and screencasts can be uploaded on a ShowMe profile and then later on embedded on a blog or website. Explain Everything has the advantage of being able to import media such as PDFs or PowerPoints/Keynotes, and annotate over them while recording voice. However, Explain Everything screencasts may need to be uploaded on YouTube or Vimeo first in order to embed them on a blog/website.
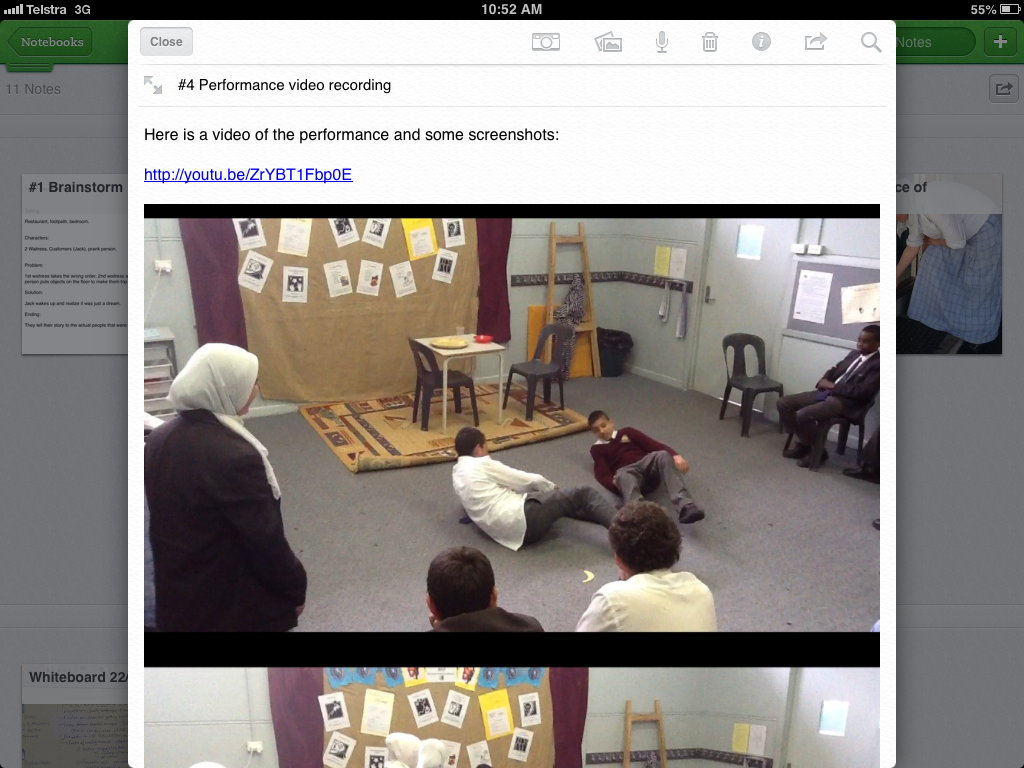
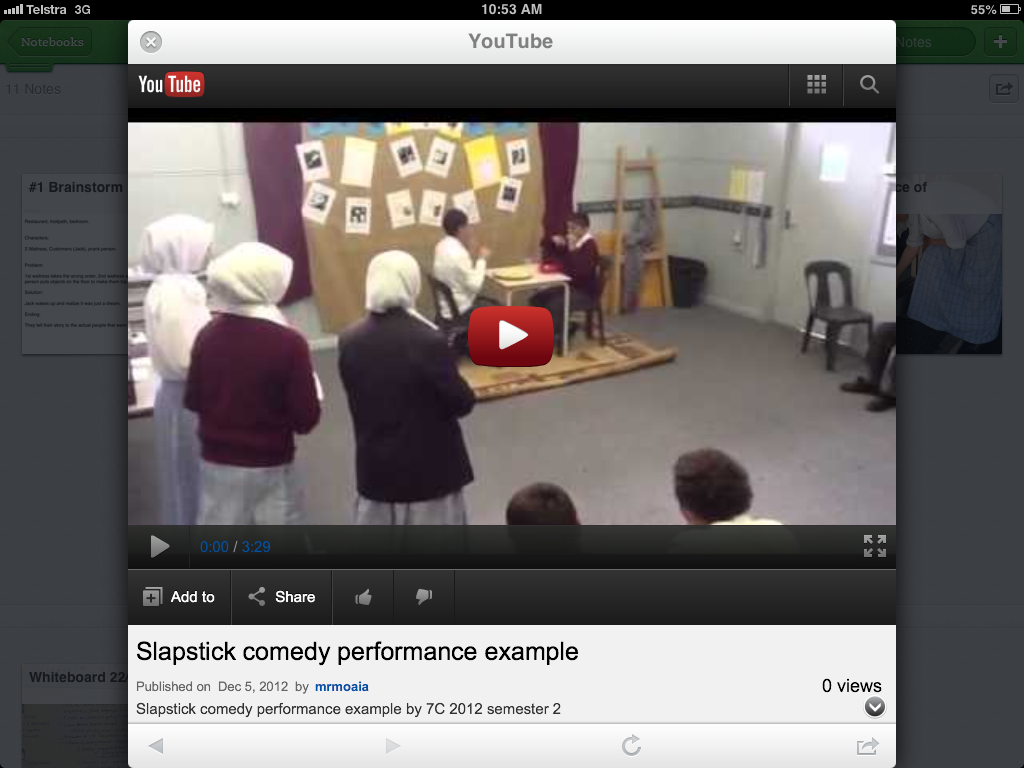
  3. Movies/videos: I believe iMovie is by far the easiest to use (though many others disagree). My students use iMovie to create trailers, edited videos, short movies, and photo presentations with music and text. I think all that is quite enough for a classroom activity or task in any subject. Again, uploading these videos/movies on a class YouTube or Vimeo channel can allow embedding them on a blog/website/wiki.
  4. Podcasts: My favourite is Audioboo (but there are many others out there like using Audio Memos along with a Posterous account). My students record their Audioboos and then embed them on their blog/website. Some students also prefer using GarageBand to record audio files, and then import them into iMovie, where they add a picture or some sort of visual element. The students would then upload the podcast onto the class YouTube channel and embed it into their blog/website.
  5. eBooks: I prefer to use Book Creator because it is easy and relatively efficient. You can also embed all sorts of media into your eBook, which a lot of students like to do. eBooks can then be uploaded onto the students’ e-portfolios, or even embedded/hyperlinked onto their blogs/websites.
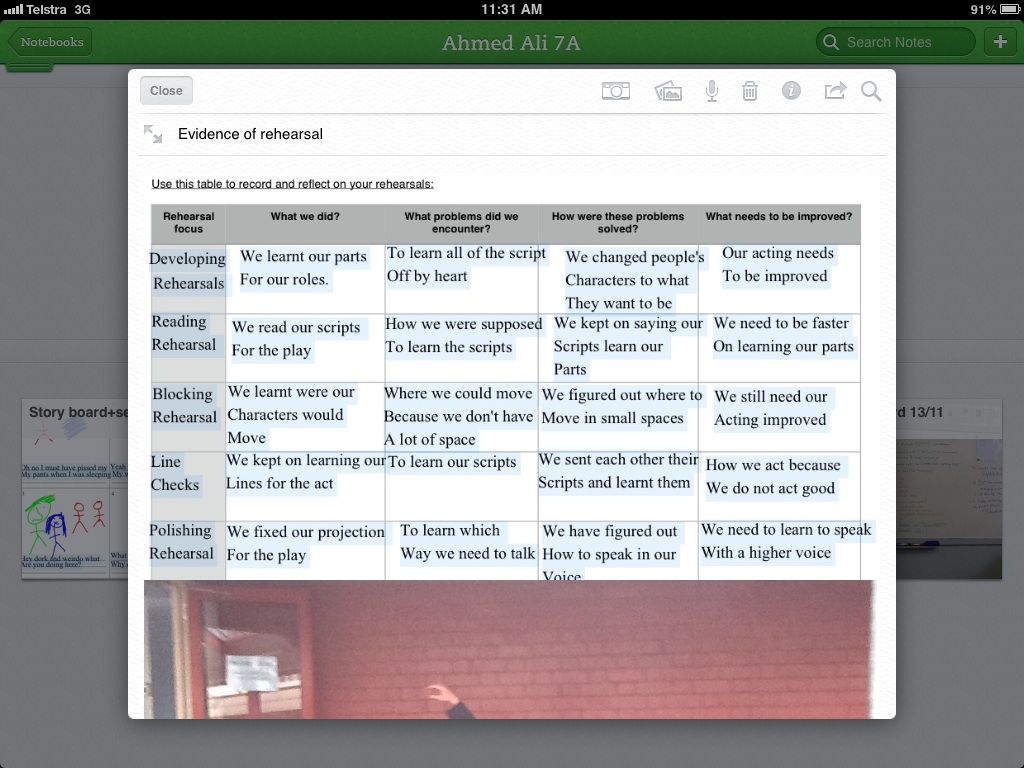
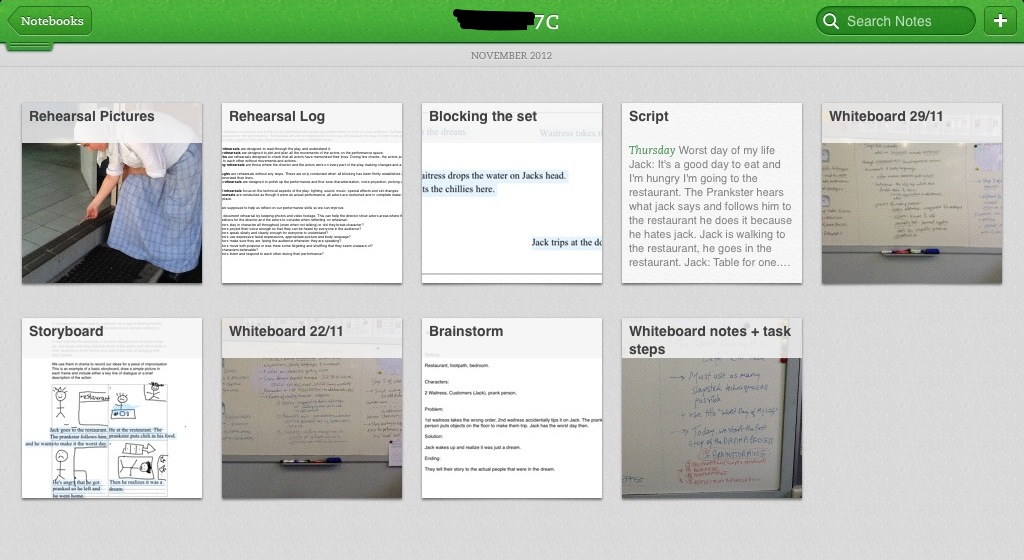
  6. ePortfolios: A blog, wiki or website can definitely be used as an ePortfolio. But for teachers who may be quite wary about age restrictions or the safety of their students, Google Drive offers huge potential for creating ePortfolios. Just by setting up folders and sharing them with the teacher/s, along with the Google Drive iPad app’s ability to upload all sorts of media (using ‘Open in another app’ functionality from most apps), the student can easily create and share an ePortfolio with the teacher. I have also used Evernote in many of my drama classes and I am a big fan of using Evernote for creating ePortfolios. However, I needed to set up an Evernote premium account and many teachers may refuse to do so.
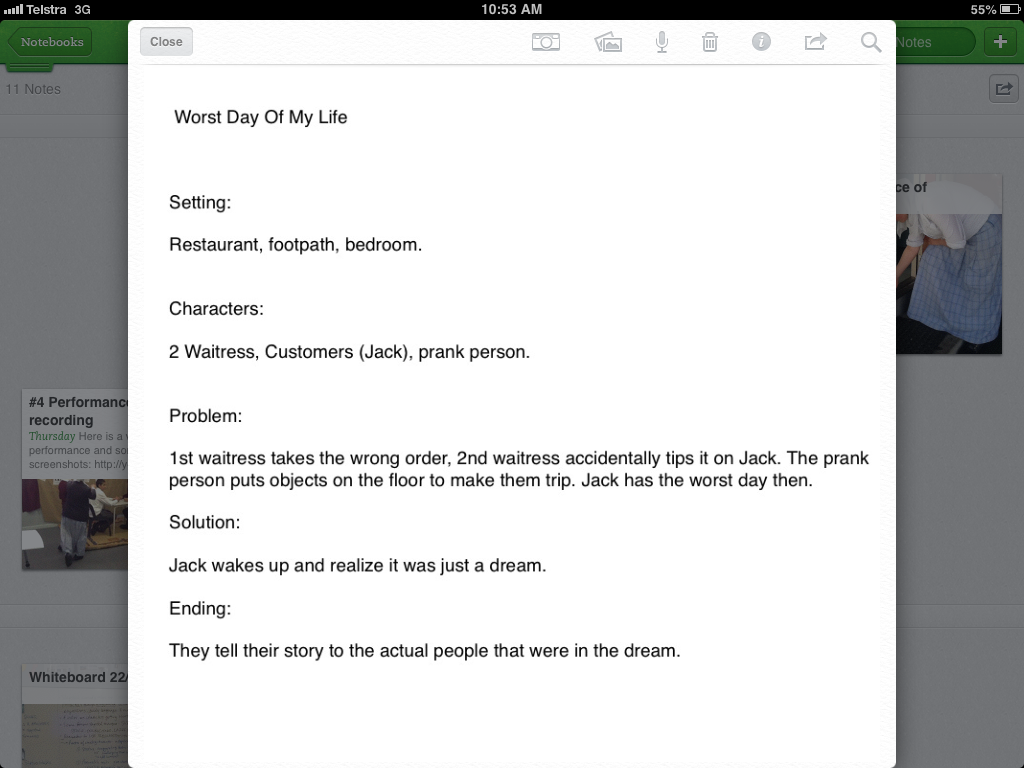
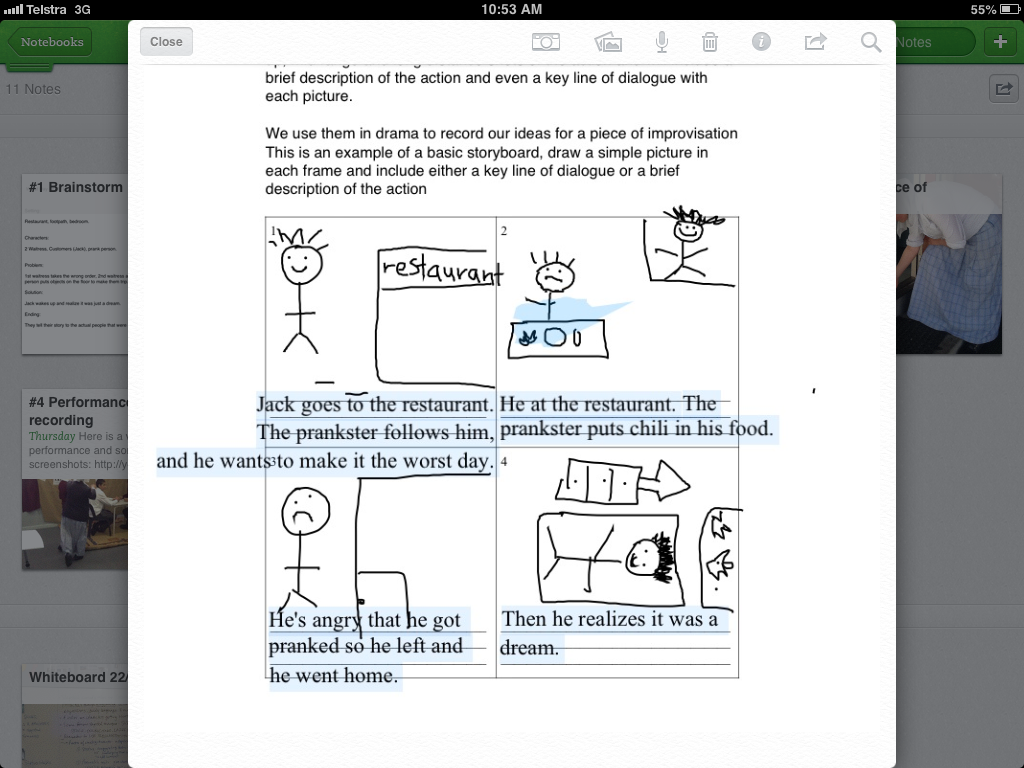
  7. Animated cartoons: I have three favourites here: Puppet Pals, Sock Puppets, and Toontastic. However, the best in teaching narrative structure is Toontastic, as there are different scenes: set up, conflict, climax, ending, and you can also add music to create different moods/emotions etc… I love using it with my four-year-old nephew just to get him to think about how to structure a story. Toontastic also allows uploading directly on ‘ToonTube‘, and then embedding on a blog/website.
  8. Annotated PDFs/Photos/Pictures: I use Notability for annotating PDFs and Skitch for annotating pictures/photos. Both can produce content that can easily be integrated with Google Drive/Evernote and thus added to the student’s ePortfolio. Worksheets and handouts can now be shared with students as PDF files and then annotated using text, highlighters, markers, pencils, images or shapes, and that is a useful function for all subjects.
  9. Microblogs: I am a big fan of Edmodo, and I am a passionate user of this learning platform. Edmodo can now also make iPad workflow much easier after a recent app update, where files can easily be uploaded through the ‘Open in another app’ functionality. Teachers can also use Twitter and Facebook for micro-blogging in the classroom, but most social-networking policies in schools place many restrictions and challenges when it comes to these tools.
  10. Comics: I often use Strip Designer or Zoodle Comics to encourage students who wish to create comics. Both apps also allow sharing in PDF formats or into the Photo Library/Camera Roll, which can then easily be uploaded on Google Drive or embedded in blogs/websites.
  11. Drawings/Paintings: I have not used many drawing/painting apps, but I generally encourage my students to use Art Set or Penultimate. There are many more, with more specialised features as well. Again, all output can be exported, shared and embedded on blogs/websites.

To conclude, I would like to restate: I am not arguing that only the iPad can allow such content-creation in the classroom, but I do believe these creations are much easier to produce on an iPad than on a laptop or desktop computer (where additional accessories are often required, along with expensive specialised software). The iPad truly is ‘a swiss army knife of content-creation tools‘ as Andrew Douch wrote, and with these words I encourage you all to go forth and iCreate.

Slapstick Comedy: wrapping up the drama process!

This term, the year 7 and 8 classes studied a unit of work on ‘Slapstick Comedy’. I have posted previously about how we explored the concept of humour in general, and how we defined slapstick comedy. Three weeks ago, we kick-started the drama process and began brainstorming for our performances, and we had the opportunity to write up the scripts and draw up the storyboards for the performances. We also had the opportunity to rehearse for our performances
Last week, we finally had the opportunity to wrap up this process and move into the final two steps: ‘performance’ and ‘reflection & evaluation’. The lesson’s warmup was a quick physical and vocal warmup followed by a final run-through rehearsal outside in the courtyard. After that, the students formed an audience and we watched every performance. The audience were asked to give feedback to each group of performers in the form of positive comments or useful suggestions for improvement. Each performance was recorded using the iPad for documentation purposes, and also to help the performers themselves reflect on and evaluate their own performance skills (as it is much more meaningful to see yourself acting in order to spot your strengths and weaknesses, and hence reflect on them). 
After all performances were presented, the students were given a chance to view their short slapstick scenes, and then use the reflection help-sheet to write their four-sentence reflections and the task-sheet evaluation checklist to evaluate the process as well as the final product. For the year 7 classes (who have iPads), I allowed them to record their reflections orally and attach them to their Evernote group-portfolios/shared-notebooks. After the lesson, I looked through all group-portfolios and I attached my written and oral feedback, and final assessment. 
Overall, I think the task was very engaging for the students. This was the first task where I agreed to allow some students to just be writers and directors for their group’s performance, as many students did not really seem to enjoy performing or were too self-conscious. I believe these students were a lot more engaged with the task.
Below you will find a video-tour of one of my year 7 portfolios for this task, followed by some screenshots of evidence attached to the some group portfolios to document every stage in the drama process: brainstorming, preparation (script-writing/story-boarding), rehearsal, performance, reflection & evaluation.
And this, ladies and gentlemen, concludes our year in the drama classroom! Summer here we come!

A screenshot of the final portfolio
A written outline/brainstorm for the performance
A visual brainstorm for another performance
The script writing-phase
A storyboard (shared as a PDF file with the students and they used an app called Type on PDF to annotate over it)
Another storyboard – these students preferred hand-drawings and then inserting them into the storyboard through Type on PDF
Blocking the main actions/movements in the scene
Adding evidence of rehearsal using a rehearsal log and some pictures
Evidence of performance – video uploaded on class YouTube channel and hyperlinked in portfolio + adding screenshots of parts of the video
Video of performance on YouTube (set on private or unlisted depending on parent permissions)

Oral reflections and evaluations by group members

Written and oral feedback given by teacher

Radio Drama: Create your own horror radio play (Part 2)

This term, the year 6 classes are studying Radio Drama. I have posted previously about how they created radio commercials to explore the creative potential of the voice. We also had a chance to perform poems to apply characterisation techniques to voice. Then we attempted to develop better enunciation and articulation by performing tongue-twister poems in this tongue-twisting lesson. The class also had the opportunity to explore voice projection and create their own radio interviews.

To sum up this unit of work, and to allow for summative assessment of MYP Criterion B (Application), the class will have the opportunity to create their own horror radio plays (as inspired by Orson Welles’ War of the Worlds). The task’s learning objective is to apply the skills, techniques and processes used to create a radio drama performance. This task was planned to span over two weeks (one double-period per week). Last week, I posted about the first week of the task, where the students wrote their stories and brainstormed possible sound effects and background music to accompany the narration.
This week, we moved on to the next part of the drama process: to apply rehearsal strategies  and to reflect on and evaluate our artwork (process and product). The warmup for the lesson was a radio drama rehearsal game that I always enjoy: the students move into their groups and rehearse their radio plays five different times, each time with a different focus: once in normal speed, once in super slow motion (to force them to clearly pronouncing each vowel and consonant), once in fast forward (a very fun and tongue-twisting articulation and enunciation exercise), once as a comedy (to get them to think about tone and emotions in voice), and once as a musical (to help them warmup their voices and think about tone and emotions in voice). The students were encouraged to record their rehearsals using their iPods, listen to them and reflect on their characterisation, enunciation and voice projection. This warmup exercise achieves several objectives: to help students warmup, to rehearse for their performances, and to become more confident and ready for performing in front of the audience. The debriefing that followed the warmup was designed to ensure that the students take meaning out of this exercise (other than it just being ‘fun’) and reflect on it.
After the warmup and debriefing, the students sat in front of the performance space and formed an audience. Each group subsequently hid behind a curtain set up for the task, and delivered their horror radio play. The audience would then be asked to think like critics and give feedback (positive comments or useful suggestions) for the performers. Each radio play was recorded using my iPad. After all performances, the students were asked to bring out their task sheet and rubric from their drama folders (handed out to them last week). We then heard all the recorded performances through the class projector to help each student reflect on and evaluate his/her performance. Each student listened to his/her group’s performance, used the self-assessment checklist in the task sheet to self-assess, and then gave themselves a mark out of ten using the rubric attached to the task-sheet (in the ‘student’s self assessment’ column). 
After the self-assessment and evaluation, I had the opportunity to quickly conference with each student (for one or two minutes) and allow them to reflect orally on the process and product and justify their self-assessment. I concluded the conference with assigning each student his/her mark in the teacher self-assessment column and giving them oral feedback. 
It was a very busy lesson, with lots to do! However, I believe the task as a whole was a huge success and the students seemed very engaged with it. I believe this task can also be adapted and used in a non-drama classroom: English/ESL, LOTE, even Humanities classrooms where students create radio plays about social issues.
Below are embedded clips of the best three performances, as well as screenshots of the self-assessment checklist, the adapted MYP rubric used, and the whiteboard.

iCollaborate: making the most of collaborative learning in an iPad classroom?

    20121207-225612.jpg

I started my teaching career at an international school in Egypt. This school had a very structured curriculum and used standardized testing very often. I learned a lot from working there, I have to admit. But one thing I found rather displeasing about the curriculum was that it only encouraged and facilitated individual learning. There weren’t many opportunities for group work or collaborative learning.

When I moved to Australia, I took up a job at an IB school in Melbourne. I am still working there as an MYP Performing Arts, English/ESL and Humanities teacher. I noticed that some teachers shy away from group work. To be fair, group work does pose challenges that may not necessarily be present in individual tasks. One of the biggest challenges of group work is how to assess each student’s contribution to the final product.

I believe the benefits of collaborative learning far outweigh the challenges (I recommend reading this article to find out more about the benefits of collaborative learning and how to make the most of it). I also believe that, when utilized correctly, mobile technologies (like the iPad) can facilitate collaborative learning and make it easier to assess, as well as document evidence of every step of the learning process.

This it what I do in my classroom to make the most of a collaborative learning process that incorporates the iPad (i.e. to minimize distractions, maximize group engagement in the collaborative process, and to manage the classroom more effectively):

    1- Use a ‘group work log’ on Google Forms: I divide my class into ‘theatre companies’ which is the fancy name I give to the groups. Before every task, I create copies of this google form, one copy per theatre company/group, and I share the URL with them (or give them QR codes). The students are required to fill out this group-work log after every lesson spent on the task (for example, if the task is spanned over three lessons, then each group member has to have submitted three entries). The advantage is that all entries have a date/time stamp, and this form allows the documentation and evaluation of, and reflection on, every step of the collaborative learning process.

    20121207-222957.jpg

    2- Break the task into mini-tasks or steps and assign each student a mini-task/step: this is very similar to assigning group roles, such as group encourager, group reader, group writer etc… I have found that breaking the task into steps and assigning each student a step (or allowing them to divide the steps between them) gives the students more ownership over their part of the process. These mini-tasks can be independent of each other or built on one another. For example, in a drama assessment task, I would ask the group to give each member the responsibility of documenting evidence of a different part of the drama process: one member is responsible for documenting brainstorms, another for documenting the script-writing process, another for documenting the storyboarding phase, another for documenting the rehearsal phase etc… I would normally setup and use a shared notebook with the students on Evernote to help with this process of documentation. It is important to mention and explain to the students that even though each student is responsible for documenting evidence of each step of the process, they still have to all work together and collaborate through all steps. Here’s a screenshot of an Evernote portfolio/shared-notebook for students to document evidence of each step of the drama process.

    20121207-224356.jpg

    3- Allow one-iPad-at-a-time per group: one of the most common ways of assessing group work and documenting evidence is guided and systematic teacher observation. However, in a class full of 25 students, and each on their own iPad, this might be difficult. I prefer to allow only one group member on an iPad at-a-time, while the others are using some other medium to continue with their work. This means I only observe 4-5 students on iPads at-a-time (as I usually have 4-5 theatre companies per class). For example, maybe in the brainstorming phase, the group could draw a mind map on poster paper, while one group member copies it into their iPad on a brainstorming app (here are two examples, one involving a google form, and another involving a typewith.me pad). To make my observations more meaningful, I often use a quick checklist of the ‘behaviors and attitudes to group-work‘ (which have been taught in the classroom) to guide my observations, and also to keep a record of them (I have the checklist as a picture in my camera roll and I just import it into ‘Skitch‘, which syncs automatically with Evernote). You might decide to share the checklist with the observed student/s but I prefer to just conference with them quietly and give them oral feedback based on my observations.

    20121208-104728.jpg
    4- Ask students to document the group-work process using various forms of media: I always tell my students “it’s all about the evidence”. Luckily, the iPad is a camera, voice recorder, interactive whiteboard (or can be) and typewriter all rolled into one device. I always encourage the students to take photos/screenshots of their group work as documentation, record audio notes of their group discussions, create screencasts of their group brainstorms, take video footage of their rehearsals, or even jot down simple anecdotes of group work. I also encourage them to vary the forms of evidence and choose that which caters the most to their preferred learning style. This evidence can all be added to one note in their shared notebook, which they can call “evidence of group work” or anything similar.

    5- Emphasize the process more than the product: collaborative learning should be more about the process of learning and working together, as opposed to creating a finished product to submit to the teacher. I prefer incorporating student reflection and student self-assessment during every phase/step of the process, as opposed to just using a rubric to assess a final product that the students submit. I also constantly remind my students that we learn a lot from the process itself, and that their main aim should not just be to finish and submit a finished product.

How do you make the most of group work in your iPad classrooms? Please feel free to share your ideas, tips, experiences and suggestions in the comments below. Happy iCollaborating!

Slapstick Comedy: Step three of the drama process!

The year 7 and 8 classes are studying a unit of work on ‘Slapstick Comedy’. I have posted previously about how we explored the concept of humour in general, and how we defined slapstick comedy. Two weeks ago, we kick-started the drama process and began brainstorming for our performances, and we had the opportunity to write up the scripts and draw up the storyboards for the performances
This week we moved on to step three of the drama process: rehearsal. The lesson started with a quick warmup called Status Pictures, where the students form still-images depicting situations involving characters of different status. This warm-up was chosen to get students thinking about status relationships and how they are used in slapstick comedy to create humour. After the warmup and debriefing session that followed, I recapped on the theoretical part of the unit which was written on the whiteboard (pictured below); then the students moved into their groups (or ‘theatre companies’) and were each given a rehearsal handout (A4 size) and an A3 size Rehearsal Log. I circulated around each group to check their progress and to recap over the rehearsal process: what is its importance and how can it be used effectively?
The students spread around the drama room (some groups moved outside into the courtyard) and they each rehearsed a few times. The groups were told to choose a different focus for every rehearsal (e.g. body language, or blocking, or voice etc…), to fill out the rehearsal log after every rehearsal to reflect on it, and to document their rehearsals with photos and some video footage (using smart-phones/iPods for year 8s, or iPads for the year 7s). The students were also told to keep evidence of their rehearsal in their portfolios: e.g. annotated pictures from rehearsal (printed from classroom printer) and the rehearsal log. For the year 7 students, who all have iPads, this evidence was just added to their shared Evernote notebook which they used as their group portfolio
The rehearsal process seemed to go rather efficiently, and everyone had a meaningful role as each student was either acting out in rehearsal, or taking photos/shooting video, or filling out the rehearsal log. The groups also seemed much more committed to the rehearsal process due to of having a different focus for every rehearsal. Below are some snapshots of the rehearsal logs of a couple of ‘theatre companies’, a snapshot of the whiteboard, and a screenshot of an Evernote portfolio from one of the year 7 groups.
Next week, we move into the final two steps of the drama process: performance, followed by reflection and evaluation. Stay tuned ladies and gentlemen!